3.Services
3.1Service management
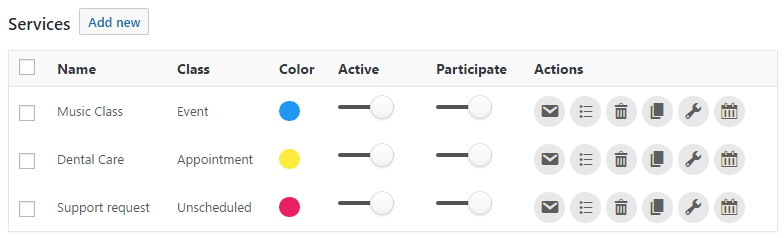
Go to Team Booking => Services and you'll find a table with all the services listed.
There are some aspects of a service management that are relative to the service itself (Global management), while other aspects are relative to the "relationship" between the service and the service provider (Personal management).
3.1.1Global management
Let's see what are the global service aspects.
-
Activate/deactivate
See the
Activecolumn? There you can conveniently activate/deactivate each service. When a service is not active, it will not be shown in your frontend. -
Delete
By clicking on the trash icon, the service will be removed (a confirmation modal will appear).
-
Clone
By clicking on the double sheet icon, the service will be cloned. You will be asked to provide a new service id.
-
Configure the reservation form
The dotted list icon will take you to the reservation form configuration page. There you can create/modify the reservation form for that service. Check the dedicated documentation section for all the details about the reservation form management.
-
Configure the service global settings
The wrench icon will take you to the service global settings page. There you will find all the service settings which are applied globally (i.e. they are valid for all the service providers). Check the dedicated documentation section for all the details about the service global settings management.
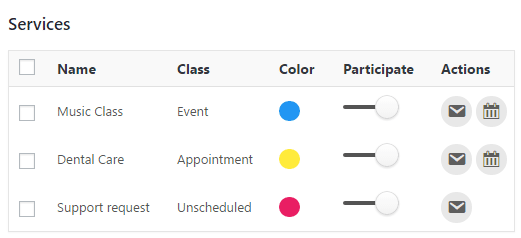
Note: the global management can be performed by Administrators only. For example, this is what a non-Admin service provider only sees:
3.1.2Personal management
Let's see what are the personal service aspects.
Important: depending on your business workflow it may or may not affect you, but it is crucial to understand that the personal management is done at user level. So, if you modify a personal management setting, it will be valid only for your user.
-
Participation
The
Participatecolumn allows a service provider to choose to be or not to be available for a given service. This is particularly useful if a service provider wants to be temporary unavailable to one or more services without actually editing his availability plan in Google Calendar.Instead of the switch, there will be some labels under particular circumstances:
-
not activewhen the service is currently not active. -
assigned to someone elsewhen the service is directly assigned to another service provider (coworker), so you can't choose to partecipate to it. -
assigned to youwhen the service is directly assigned to you, so you can't choose to not partecipate to it.
-
-
Personal availability settings
The calendar icon will take you to a configuration page in which you can trim some key aspects of the relationship between that service and your Google Calendar.
3.2Service global settings
Note: only Administrators are allowed to this section.
In this menu are grouped the service's global settings.
3.2.1General settings
-
Name
The name of the service. This will be the name that customers will see on the frontend.
-
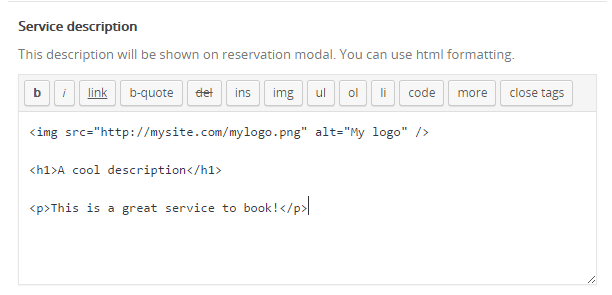
Service description (optional)
A description of the service. It appears to the customer inside the reservation modal form. You can use HTML!
-
Service color
The color of the service. will be used by the frontend calendar for the filter menu and the remaining slots dot.
-
Max total tickets per slot (Event class only)
You can specify the maximum number of total tickets for the same slot. The maximum value is 200, this limitation is due the maximum attendees number for a single Google Calendar event.
-
Max user tickets per slot (Event class only)
By default a customer can book only one ticket per single slot. If you want to allow the customer to book multiple tickets per slot, provide the maximum number here.
Note: a customer is allowed to place multiple reservations for a single slot until the total tickets of those reservations fits this setting. To determine whether a customer has already placed a reservation and to count its total tickets number for the slot, TeamBooking checks the WordPress User ID if the customer is logged in, otherwise it checks the e-mail address provided in the reservation form.
-
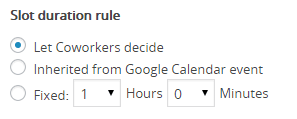
Slot duration rule
A single slot duration can be fixed or inherited from the relative Google Calendar availability event. Admins can make the choice, or delegate the choice to every coworker.
-
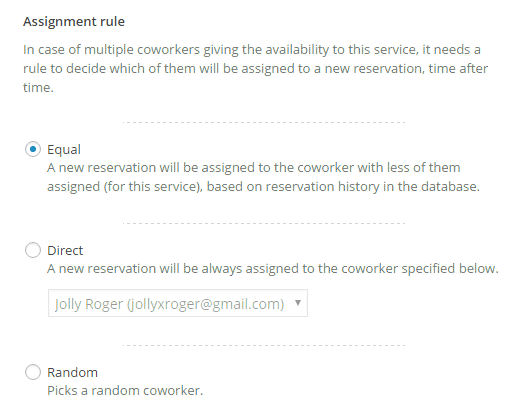
Assignment rule (Unscheduled class only)
Unscheduled services don't rely on coworker's availability plans. So, if you have multiple service providers, you also need to set a rule for the assignment of every service request/reservation.
Those rules are:
-
Equal: Team Booking assigns a new service request to the Coworker with less assignments of that service in the past. The aim is to get equal requests per coworker in the long run. This is the default option.
-
Direct: you can choose to assign the service requests directly to a specific Coworker.
-
Random: every new service request will be assigned randomly.
-
-
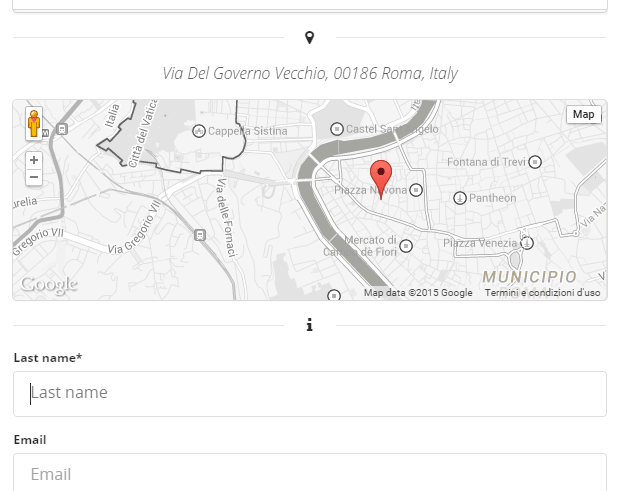
Location
If you want to show a map for the service location on reservation modal, then choose either a fixed location or a variable location based on the
Locationfield of the coworker's Google Calendar slot.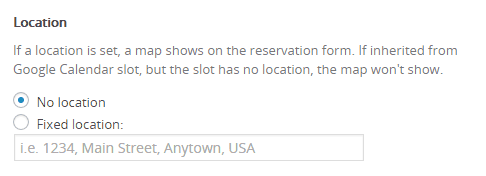
WARNING: in order to show the Google Map in your frontend, you need to be in possession of a Google Maps token. Check the Core Settings section of the documentation for further information.
Note: for fixed location option, ensure to specify a full and pretty formatted address, as it will be shown in the frontend reservation modal.
-
Show map
If a location is set, a map will be shown by default. Change this setting to hide the map if it is not needed.
-
Create Zoom Meeting (Event and Appointment classes only)
A Zoom Meeting is automatically created after a reservation.
3.2.2Payments settings
-
Price for reservation (optional)
Put here the price of the reservation, if any. If zero, it won't appear.
-
Payment must be done (only if price > 0)
-
Immediately. The customer is redirect to the payment gateway after the reservation. If no payment will be done within the Max Pending Time specified in Payments gateway section, the reservation will be released.
-
Later. The customer will pay on a later time. Team Booking will not handle the payment, and you should manually set the reservation as "Paid", eventually.
-
At the customer's discretion. The customer choose whether redirect to the payment gateway after the reservation, or pay locally/later. If he wants to pay on a later time and/or cancel the payment, the reservation will still be in place, as "Not paid". You should manually set the reservation as "Paid", eventually.
-
3.2.3Frontend slot settings
-
Show sold-out/booked slots (Event and Appointment classes only)
Choose "Yes" if you want to show the booked/full/soldout slots of that service on the frontend calendar.
-
Show tickets left (Event class only)
If "Yes", the number of reservations left for a single slot will show up near the slot. You can also define a threshold for the remaining tickets to be shown.
-
Show slot attendees (Event class only)
You can choose to show in the frontend calendar, right inside the slot, some of the data of the customers who are already attending to that event.
Please carefully consider any privacy-related implications.
If you choose to display the e-mail address of the attendees, please note that TeamBooking uses the WordPress "antispambot" built-in function to display e-mail addresses to the frontend.
-
Show start/end times (Event and Appointment classes only)
Possible values are
Show start/end,Don't show,Show start time only -
Show coworker's name (Event and Appointment classes only)
If "Yes", the coworker name relative to each slot will be shown in the frontend calendar. As Coworker name, Team Booking picks the WordPress user first name and last name. No such private data will ever be picked from any Google Calendar.
-
How to treat discarded free slots (Event and Appointment classes only)
Discarded free slots (as a result of overlapping events under certain ovelapping settings, or in the context of a multiple services container) can be simply discarded (i.e. hidden from the frontend) or shown as booked/sold-out.
-
Link coworker's profile page (Event and Appointment classes only)
If "yes", and if the
Show coworker nameoption is active, then the coworker's name becomes a link pointing to Coworker's profile page. You can set the profile page for each of your Coworkers from theCoworkerstab.
3.2.4Access settings
-
Who can make reservations
If
logged users onlyis selected, then only logged users are allowed to place a reservation. The not logged users still see the frontend calendar in read-only mode.
-
Max reservations per logged user (Unscheduled class only)
You can set a limit of reservations for logged-in users. A counter will be shown in the
Book nowbutton. When the limit is reached, a logged user can't place reservations of that service anymore, unless you reset his status (check the Customers section of the documentation to see how).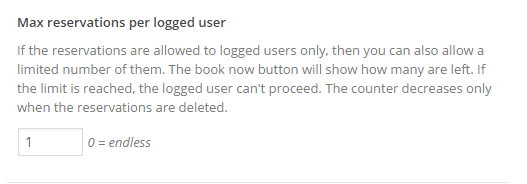
3.2.5Approval settings
-
Approval requirement
You can setup a service so that the reservation requires approval before being confirmed to the customer. If required, the approval can be done by admins or by the involved coworker.
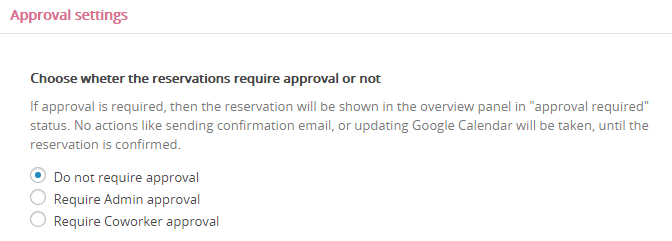
When a reservation is booked, you'll see his record in the
Overviewtab, marked asWaiting for approval.Then you can chose whether accept it or decline it
  .
.

-
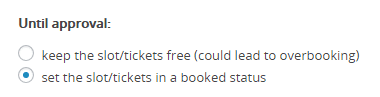
Until approval
There is the possibility to chose the availability behaviour of the waiting for approval reservations. They can stay free (bookable) until the approval, or they can be considered as booked until approval. Please note that the first option could lead to overbooking, with unpredictable results, anyway.
About e-mail notifications when approval is required
If a reservation is set to be approved by an Admin, he gets the e-mail notification, while the service provider and the customer will get their ones only after the approval. If a reservation is set to be approved by the service provider, both the Admin and the service provider get the e-mail notification, while the customer will receive the notification after the approval.
Check the e-mail settings paragraph for more details.
3.2.6Cancellation settings
Here you can chose whether or not the customer should be able to cancel his reservations, and the time limit after he can't cancel a reservation anymore.
-
Allow cancellation by customer
If active, a customer can cancel his reservations by accessing to the reservation list in the frontend (check how to configure a frontend reservation list) or by the cancellation link set via confirmation e-mail.
When a customer cancels a reservation, the relative slot in the Coworker's Google Calendar will change accordingly (Appointments will be freed, Events will release the reserved tickets). Both Service provider and Admin will see the reservation as
cancelledin the backend reservations list.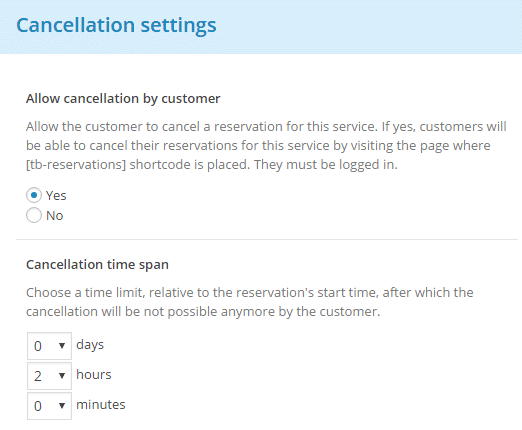
-
Cancellation time span
Choose a time limit, relative to the reservation's start time, after which the cancellation will be not possible anymore by the customer.
3.2.7Redirect and conversion tracking
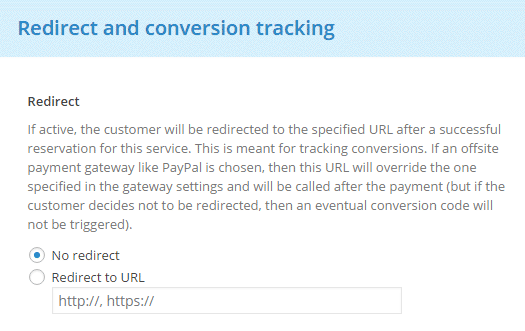
If the redirect is active, the customer will be redirect to the specified URL after a successful reservation for the service. This is meant mainly for tracking conversions.
If an offsite payment gateway like PayPal is chosen, then this URL will override the one specified in the gateway settings and will be called after the payment (but if the customer decides not to be redirected, then an eventual conversion code will not be triggered).
URL parameter to track the reservation
When you specify a redirect URL for the service, TeamBooking automatically adds the reservation's ID as a parameter to the URL.
For example, if you have set the following URLs...
http://mysite.net
http://mysite.net/path?my_parameter=yes
...they become respectively
http://mysite.net/?reservation_database_id={INTEGER}
http://mysite.net/path?my_parameter=yes&reservation_database_id={INTEGER}
That's useful when your redirect URL contains a custom script for further data processing. With the reservation database ID, you can access to the reservation data e.g. via the TeamBooking API.
3.3Personal availability settings
In this page you can configure the relationship between your own Google Calendar(s) and the service.
3.3.1Event properties
-
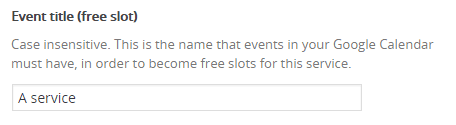
Event title (free slot)
The name that an event in your Google Calendar must have in order to become a free slot for this service.
-
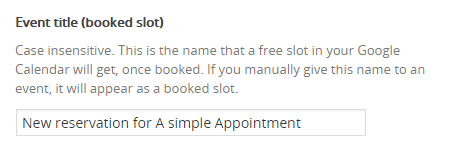
Event title (booked slot) (Appointment class only)
The name that a free slot in your Google Calendar will have, once booked.
A note: if you manually give this name to an event, it will be considered as a booked slot.
-
Event title additional dynamic data (booked slot) (Appointment class only)
Additional customer's data to be appended to the Event title (booked slot). This additional data, if available, will be preceded by a
||delimiter.A note: you can manually append some data after a
||delimiter in your Google Calendar, if you need to "mark" an event or just put some notes on it. The plugin will ignore that data.
-
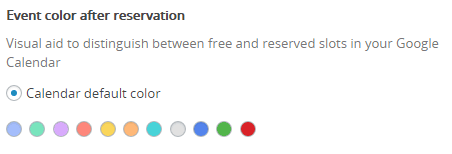
Event color after reservation
Once booked, the event in your Google Calendar will be colored as selected here. This is intended as visual aid to distinguish between free and reserved slots in your Google Calendar.
-
Event description content
Specify what should be the content of the updated event description when a reservation is made.
Warning
If privacy is your concern, then keep in mind: because of how Google Calendar works, the event description content will be visible by customers who have booked it.
-
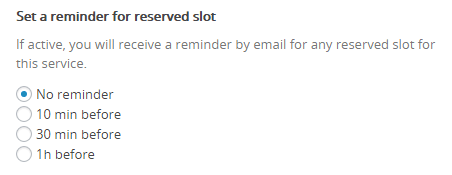
Set a reminder for reserved slot
By default, no reminder will be set for any reserved slot. You can change this, choosing to set a reminder for the reserved slot.
Warning
This reminder is the Google Calendar event reminder, so it's for the service provider, NOT for the customer.
-
Add customers as guests of the Google Calendar event
Choose whether the customer must be added as guest of the Google Calendar event. If yes, it will receive Google notifications according to your Google Calendar settings, a copy of the event will be created in his Google Calendar (if any) and he will be able to read the event description. He will not be able to see the guests list.
Default is Yes.
3.3.2Slot properties
-
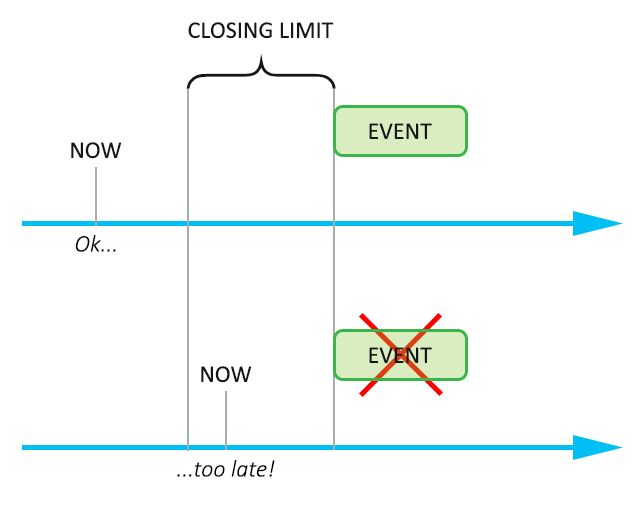
When reservations should be closed?
Choose the minimum time interval between the present time and your event slots start time. Under that minimum, slots will not be displayed in the frontend calendars.
The time interval can be relative to the slot's start time, or to the slot's end time, as you prefer.
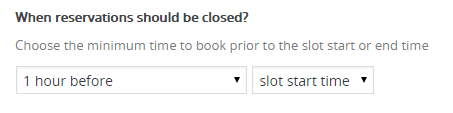
To a better understanding of this setting, please check this scheme:
-
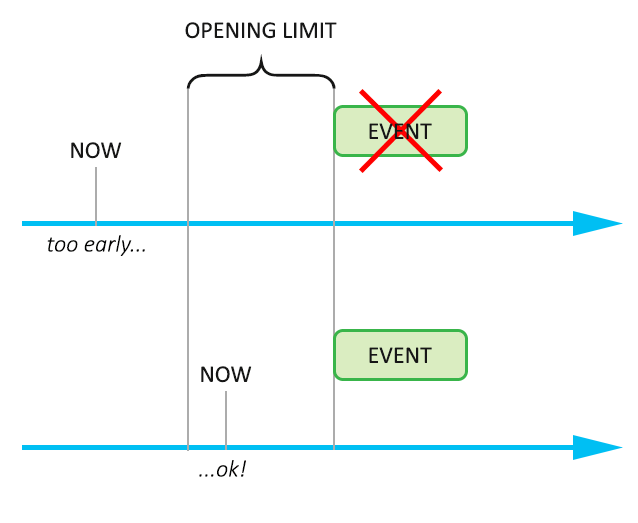
When reservations should be opened?
When we are closer than the following time span to the start time of the event, the slots begin to appear. If set to "Immediately", they appear right after their creation.

Note
If it's not set to "Immediately", then the value must be greater than
When reservations should be closed?value!To a better understanding of this setting, please check this scheme:
-
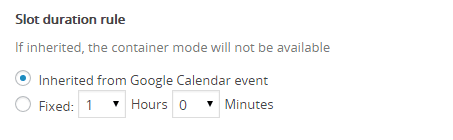
Slot duration rule
The slot duration can be fixed or inherited from the relative Google Calendar availability event. You can choose between them only if administrator gave to you that possibility.
-
Buffer between consecutive slots
If the slots duration is fixed, then this is the buffer between two consecutive slots inside a
container slot.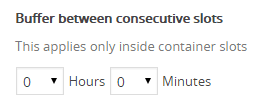
3.3.3Overlapping events
How other events in your Google Calendar must interact with the availability ones, if they overlap?
Note
The overlapping condition is evaluated when two events lie on the same Google Calendar. If they are on different Google Calendars, then in order to be considered as overlapping both the Google Calendars must be not independent (refer to the Google Calendar's interdependency paragraph to know more).
-
Overlapping with personal events
If you have personal events in your Google Calendar(s), choose what to do with a free slot of this service, in case one of them overlaps.
-
Keep the free slot, is the default value: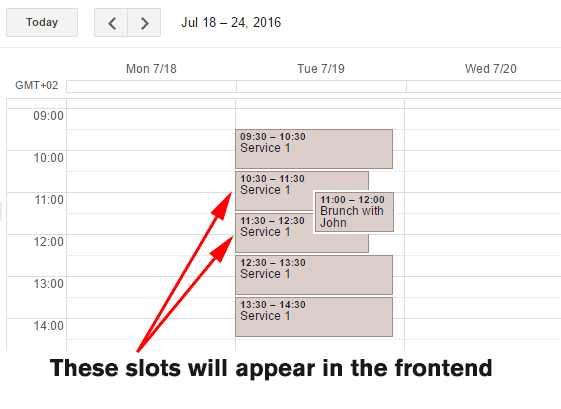
-
Discard the free slot, all the eventual overlapping free slots of that service will be ignored: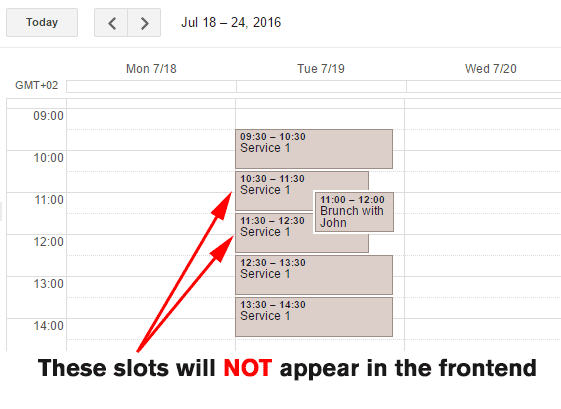
-
-
Overlapping with booked slots of the same service
If your availability plan envisages overlapping availabilities, choose what to do with a free slot of this service when a booked slot of the same service overlaps.
-
Overlapping with booked slots of other services
If your availability plan envisages overlapping availabilities, choose what to do with a free slot of this service when a booked slot of any other service overlaps.
3.4Reservation form
Note: only Administrators are allowed to this section.
-
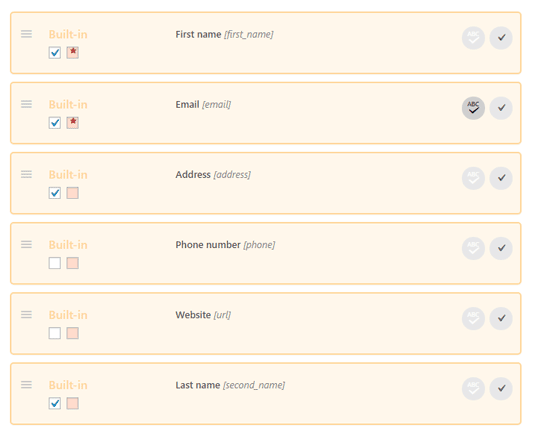
Built-in fields
Built-in fields are permanent form fields (you can deactivate them, move them, but you can't delete them), being relative to the standard WordPress user data.
-
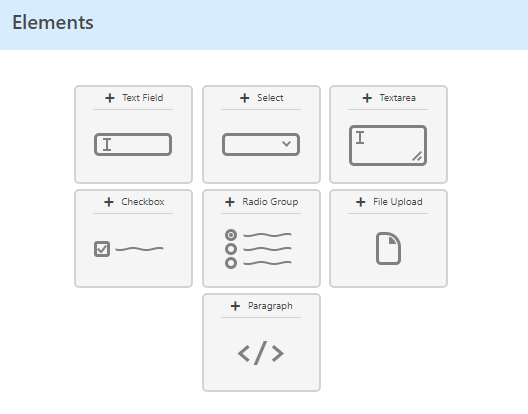
Custom fields
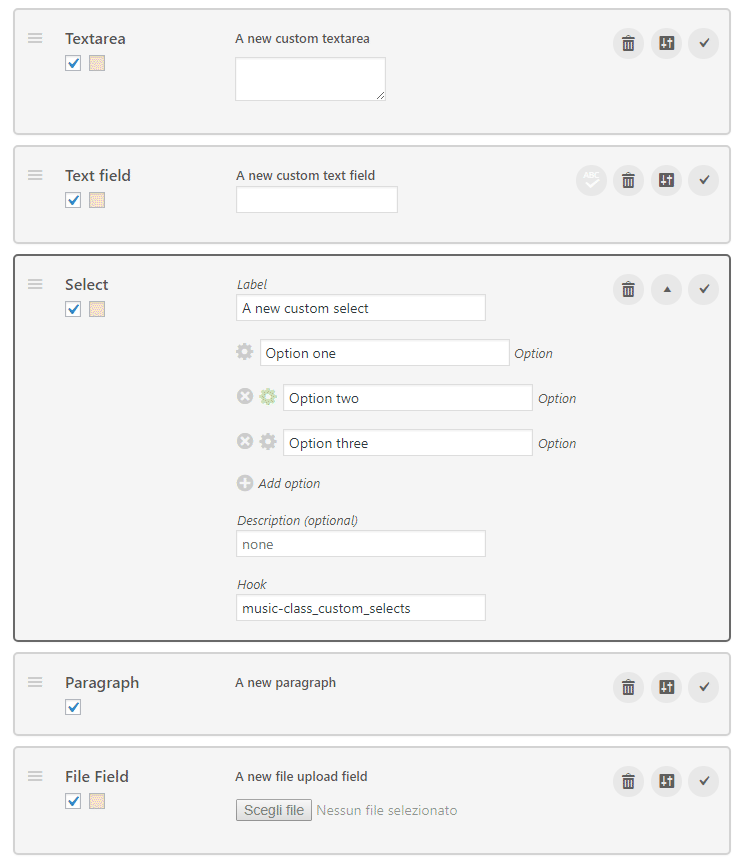
You can add your custom form fields like checkboxes, textareas, radio groups, selects and so on. The settings for each field are quite straightforward and descriptive.
Note
You should always use the built-in fields when it comes to their "business" (email, first and second name, address and phone number).
For Select and Radio group (basically, where selectable options are involved) on a priced service, you notice a small gear near the option field. This allows you to configure a specific price increment for the option, that will be applied if the option is selected by the customer.
-
Data validation
By clicking on "ABC" icon near any built-in field or any custom text field, a modal with validating options will appear. Here, you can choose to set a validation rule for that field. There are some pre-defined rules, or you can set your own custom validation REGEX. Don't forget to save the changes, when done.
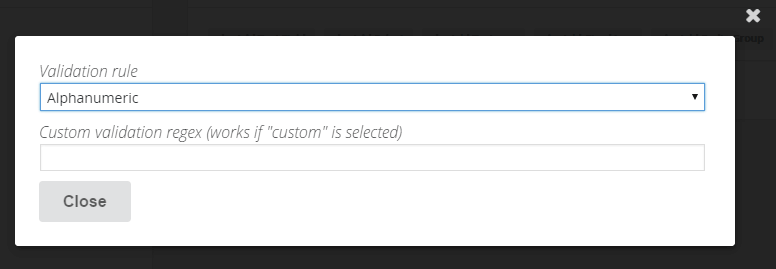
When a validation rule is active, the "ABC" icon color becomes dark-red.
3.5E-mail configuration
When it comes to the e-mail notification system, TeamBooking is very flexible about it. Under the most general circumstances, you have three people that needs to be notified of something (a reservation, a cancellation etc.): the Admin, the Service Provider and the Customer.
The notifications to the Admin and to the Customer are configured on a Global level, while the notifications to the Service Provider are configured on a Personal level. This means that the Service Provider can freely and fully configure his personal e-mail notifications about the reservations relative to his own slots.
If your business workflow doesn't admit Service Providers (i.e. the Admin is the service provider), then you don't actually need both the Admin and Service Provider notifications e-mail to be active, otherwise you'll likely receive two e-mail messages from a single reservation or cancellation action. But let's see all of that in detail.
3.5.1Admin notification and customer confirmation
Note: only Administrators can see this section.
-
The
notification e-mailis sent back to site's Admin when a reservation take place. -
The
confirmation e-mailis the one sent to the customer. -
The
reminder e-mailis sent to the customer as a reminder (EventandAppointmentclasses only). If active, you can set when it should be sent. Under the reservation details you can check if the reminder is sent or still not sent, and trigger it manually if you need to.Warning: The
reminder e-mailmessages are sent via the WordPress scheduler. The WordPress scheduler triggers the actions only when your site is visited.This behaviour is unreliable, and could lead to reminders sent too late, or not sent at all, especially when your site has low visits. For a better overview of how the WordPress scheduler works, and to understand its limits, please read this very good blog post.
The Admin address for receiving notifications is the e-mail address where the notification emails will be sent to. By default, it's the site's Admin e-mail address, but you can change it for your convenience. The change will be applied to the current service only.
Note: This address is the sender address of the confirmation e-mail sent back to customer, so it's better to use an e-mail address that belongs to the same domain of your site to avoid SPAM filters.
The Include uploaded files as attachment option lets you to attach the eventual files uploaded by customers in the reservation form to the e-mail. That's just for convenience, as the files will be saved on your site's upload folder anyway.
The subject and body configuration is quite straightforward. You can use HTML in any email content.
The dynamic data (i.e. the customer's name, or the reservation date and time) is represented by hooks. A hook is a placeholder that will be replaced with the relative content when the email will be sent. So, e.g., the [first_name] text hook will be replaced with John, and so on.
The available hooks are listed above any email body editor. Just click one of them, to insert it at caret point. Easy.
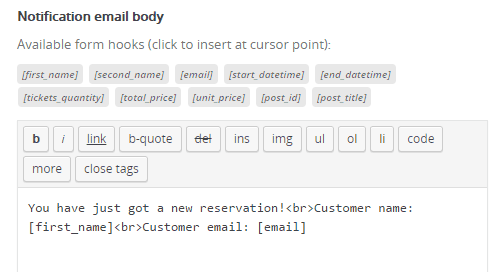
Hooks in-depth: along with the hooks relative to the reservation form fields, there are also some fixed hooks with a special meaning. Those are:
-
[start_datetime],[start_date],[start_time]replaced by the start date and/or time of the reservation (formatted as per your WordPress general settings, adapted to customer's timezone when choosen)
-
[end_datetime],[end_date],[end_time]replaced by the end date and/or time of the reservation, if available (formatted as per your WordPress general settings, adapted to customer's timezone when choosen)
-
[timezone]replaced by the timezone of the date/times (the customer's timezone, if choosen)
-
[tickets_quantity]replaced by the number of tickets booked (Event class only)
-
[reservation_id]replaced by the ID of the reservation
-
[total_price]replaced by the total price of the reservation
-
[unit_price]replaced by the unit price (discounts included, increments excluded)
-
[post_id]replaced by the post id of the frontend calendar instance from which the reservation is done, only available if you've inserted the shortcode in a post.
-
[post_title]replaced by the post title of the frontend calendar instance from which the reservation is done, only available if you've inserted the shortcode in a post.
-
[coworker_name]replaced by the WordPress profile name of the service provider.
-
[coworker_url]replaced by the WordPress profile URL of the service provider. You can edit this URL of each service provider in the
Coworkerstab. -
[hangout_link]replaced with the Google Hangout link of the event (if available)
-
[service_name]replaced by the name of the service
-
[service_location]replaced with the service location (if available)
-
[cancellation_link]YOUR TEXT[/cancellation_link]a link to let the customer to cancel the reservation, if allowed
-
[reason]replaced with the reason of the cancellation, of provided
-
[ics_link]YOUR TEXT[/ics_link]a link to let the customer to download the reservation ICS file, if allowed
-
[approve_link]YOUR TEXT[/approve_link]a link to let the admin or service provider to approve a pending reservation, if allowed
-
[decline_link]YOUR TEXT[/decline_link]a link to let the admin or service provider to decline a pending reservation, if allowed
3.5.2Your personal notification
This box configures the e-mail message that TeamBooking sends back to you as a Service Provider (hence every Service Provider can customize this on his own by accessing to the TeamBooking dashboard).
Exactly like the site admin's e-mail, you can choose to activate or deactivate the notification itself, to get files or not, and to customize the subject and the content of the e-mail, using the hooks for dynamic data.
Note As Admin, don't assume that you are configuring the e-mail message that all the service providers gets... You are only configuring the e-mail that you as a service provider get. If you're an Admin but not a service provider, you can just deactivate this notification and let your service providers to configure it in their own TeamBooking dashboards.
3.5.3Cancellation notification
Note: only Administrators can see this section.
This is the e-mail sent to the customer when the reservation is cancelled. A reason text, if present, will be eventually added automatically to the e-mail content.
You can also configure a cancellation notification that is sent back to the admin and to the coworker, when a reservation is cancelled
3.5.4E-mail templates
TeamBooking has the ability to create e-mail templates so you can conveniently import them to different services.
You can create a brand new template or editing an existing one by visiting the E-mail templates menu entry. You can also create a new template by exporting an e-mail message content that you have already set for a service clicking on the export as template button.
When setting up a new service, you can import the content of a template clicking on the import from template button.
Very important: Editing a template does NOT automatically update the e-mail contents where you imported the template before! You must re-import the template, eventually!
3.5.5Preparing the notifications to be batched
If you have the Cart feature active as well as the Batch the e-mail messages per service after a multiple slots order set to yes, then you need to prepare your messages in a proper way.
Let's say you have the following template for the customer notification e-mail message:
Hello!

	Your reservation for [service_name] on [start_date] at [start_time] is confirmed, see you!

	The Staff
When a customer books just one slot it will be fine. It is clear, though, that the template is not suitable if a single batched e-mail message must be sent to resume multiple slots of the same service.
We instruct the plugin to identify which part of the template must be repeated for each slot using the ##repeat## and ##end-repeat## delimiters.
With a little re-arrangement, our template will be ready to be batched, for instance:
Hello!

	Your reservation(s) for:

	<ul>

	##repeat##
	<li>[service_name] on [start_date] at [start_time]</li>
	##end-repeat##

	</ul>

	is (are) confirmed, see you!

	The Staff
The part between the delimiters will be repeated for each booked slot of the same service.
For instance, if the order contains 3 different slots for the "Music Class" service, the batched e-mail notification sent to the customer will be:
Hello!
Your reservation(s) for:
- Music Class on October 13th 2018 at 4.00pm
- Music Class on October 15th 2018 at 4.00pm
- Music Class on October 23th 2018 at 6.00pm
is (are) confirmed, see you!
The Staff
As you can see, the delimiters can be cleverly used to repeat template parts (supposedly, the ones with dynamic data relative to a single slot) while preserving your general e-mail aspect and HTML markup.