11.Translations
11.1Language files
All the language files are located inside the /languages plugin directory. Its structure is simple:
/languages
	default.pot
	team-booking-en_US.mo
	team-booking-en_US.po
	team-booking-it_IT.mo
	team-booking-it_IT.po
As you can see, there are two .po/.mo couples already bundled. Those are the English (en_US) and Italian (it_IT) translations. If your WordPress site language is set to English (American), then WordPress automatically picks up the "en_US" couple. If your site language is Italian, then it picks up the "it_IT" couple. What if there are no .po/.mo couple for your current site language? Then, the plugin reverts to its default internal hardcoded strings (English) and the .po/.mo files are not loaded at all.
There is also the default.pot file, which is the "base" for any other custom translation.
Whether you wish to change some strings in an already present translation (i.e. from "Book now" to "Confirm"), or made a completely new translation as per instructions that follow, you'll need to put your new files in a specific directory of your site in order to prevent your changes to be wiped out by a plugin upgrade. That directory should be:
wp-content/languages/plugins
11.2Editing the strings
So, let's say you want to change some strings (i.e. from "Book now" to "Confirm") in the current language (English, en_US). Then you must edit the en_US .po/.mo couple. Editing those files with a text editor is very tricky, especially if you're not familiar with those files. So, you'd better make use of a proper translation software. There are many solutions around the web, here we go with PoEdit which is free, simple, multiplatform and powerful.
Alternative: you might want to consider using Loco Translate, a WordPress plugin that provides in-browser editing of WordPress .po translation files.
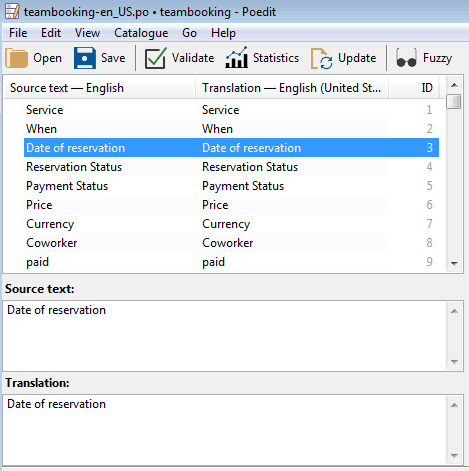
With PoEdit, you should open the .po (NOT the .mo) file you want to edit. You'll find the interface very simple, so you can easily perform a search to your desired strings and change them.
When finished, just save the file. PoEdit will also generate the .mo file (or overwrites the previous, if existent). So, if you are operating in locale, just copy the new .po/.mo couple and put them in the wp-content/languages/plugins directory of your site via FTP.
WARNING: always keep a backup of your edited .po/.mo files. If you put/replace them in the original language directory of the plugin, they will be lost after any plugin upgrade. Just put them inside the wp-content/languages/plugins directory instead and they will be preserved.
11.3Create a new translation
HINT: Before starting your own translation, you may want to take a look at the public translations repository to see if there are translation files ready to be used for your language.
That repository is a place where user translation files are freely uploaded. They are not maintained nor controlled by the plugin's developer, so can be outdated. Anyway, an outdated translation file is a good starting point.
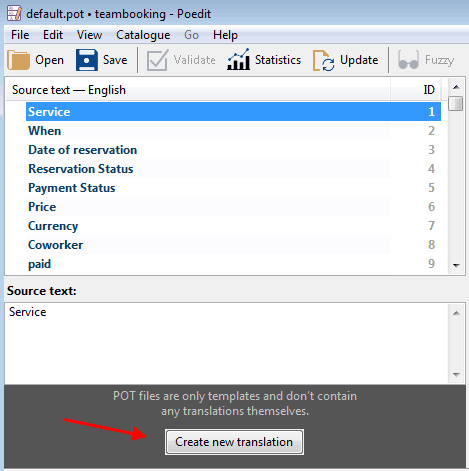
If you wish to completely translate the plugin to a new language, then you must operate with a slightly different approach than previous paragraph. Using again PoEdit, this time you must open the default.pot file. PoEdit will notify you that the .pot file is only a template, and asks if you want to create a new translation:
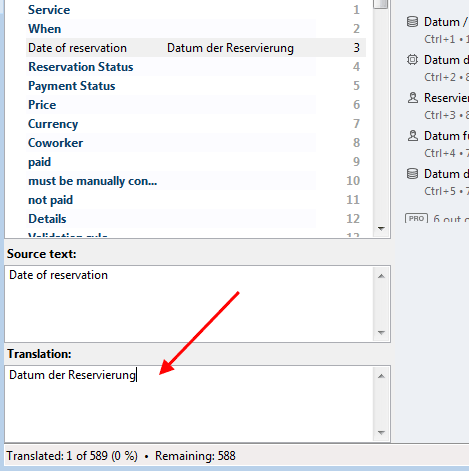
Press the button, select your language, and begin the translation work. For each string, just write your translation in the "Translation" field:
When you've finished with your translation, press the Save button, and you'll be asked to name your new .po file. You must (MUST!) stricly follow the WordPress naming rules, so the file name must start with team-booking- followed by the locale code of your language (i.e. German is de_DE, you can find a list of WordPress locales here). Pay attention to the name of the file, and to the locale code, or WordPress won't be able to load the translations.
When saved, PoEdit automatically generate the .mo file also. So you should copy those brand new .po/.mo couple and upload it to the wp-content/languages/plugins directory via FTP. Be sure your language is correctly selected in the WordPress general settings, and your new translations should be loaded instantly.
WARNING: always keep a backup of your edited .po/.mo files. If you put/replace them in the original language directory of the plugin, they will be lost after any plugin upgrade. Just put them inside the wp-content/languages/plugins directory instead and they will be preserved.
11.4Upgrading a custom translation
Let's say you've already translated the plugin in your language some versions ago. Now, a new version comes with a bunch of new strings. You could of course open the default.pot, but then you'll start again from scratch. Instead, you should open your custom .po file, go to the Catalogue menu and press Update from POT file.
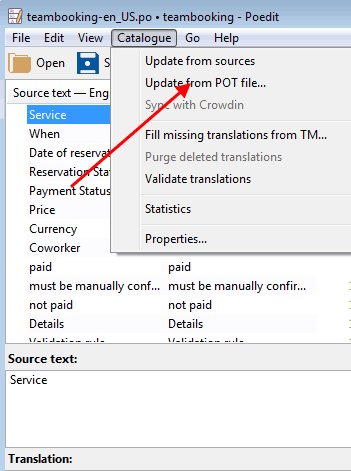
Select the default.pot file bundled with the new plugin version, and PoEdit will merge the changes. Now you can just translate the new strings and save the .po file again.
11.5WPML support
TeamBooking fully supports WPML String Translation (included in WPML Multilingual CMS Package) so you can translate also those strings that can't be translated via po/mo files, such as service names, e-mail content, custom form labels and so on.
To check if your system supports that kind of translation feature, just go in the Core Settings tab and see if WPML (under the System check section) is labeled as active.
- If you updated TeamBooking from version < 2.5.0 to a higher version while having WPML (and the String Translation module) already active, the update routine will take care of everything.
-
If you installed/activated WPML (and/or the String Translation module) after the plugin update from version < 2.5.0, the you should go into the
Core settingstab and press theRegenerate WPML recordsbutton under the "Advanced" section to correctly generate the translation records.
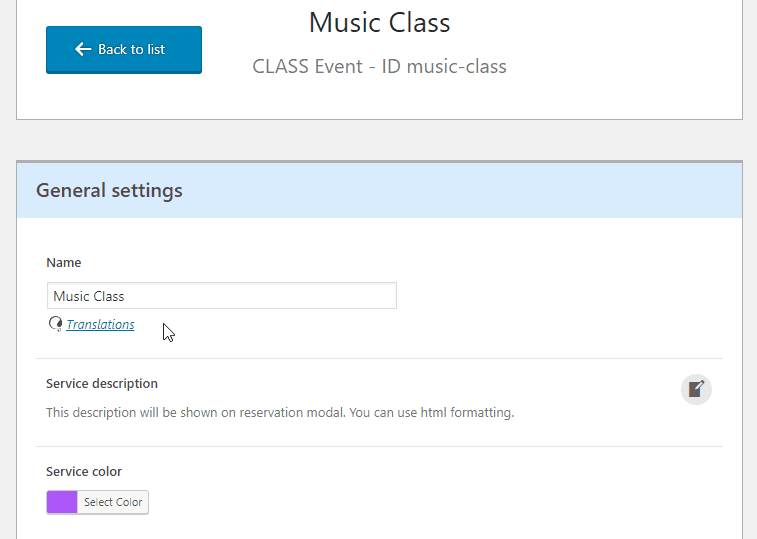
11.5.1Service name and description translations
To provide a translation for the service name and the service description just click on the "Translations" link that you find below the service name and below the service description. You will be redirected to the WPML string translations page already filtered so only the relevant strings will be shown (name and description for the current service).
Provide translations for the desided languages and mark the translations as completed.
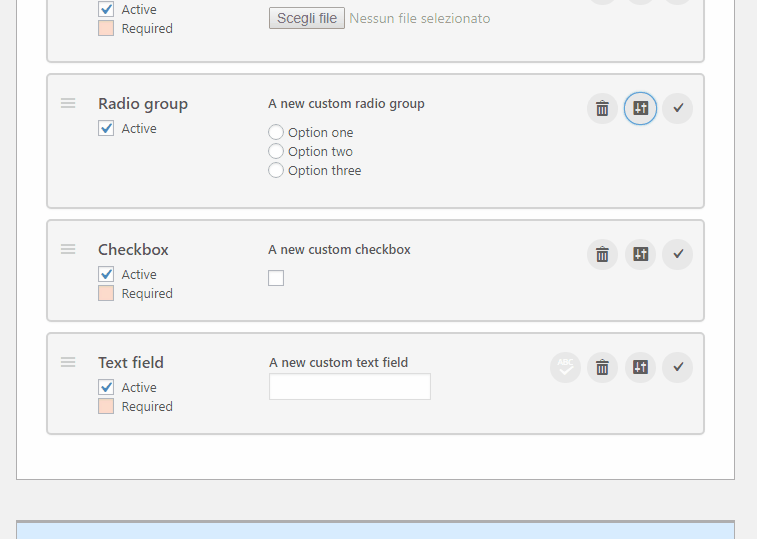
11.5.2Custom form fields translations
To provide a translation for the custom form fields just click on the "Translations" link that you find below each field (no matter what). You will be redirected to the WPML string translations page already filtered so only the relevant strings will be shown (all the custom form fields for the current service).
Provide translations for the desided languages and mark the translations as completed. Please note that some fields may have more strings to translate. For instance, a radio group will have a string for the label and one string for each selectable option.
11.5.3E-mail content translations
Similarly, to provide a translation for the e-mail contend (both subject and body) just click on the "Translations" link that you find above the e-mail body. You will be redirected to the WPML string translations page already filtered so only the relevant strings will be shown (body and subject for the confirmation/cancellation/reminder e-mail messages).
Provide translations for the desided languages and mark the translations as completed.
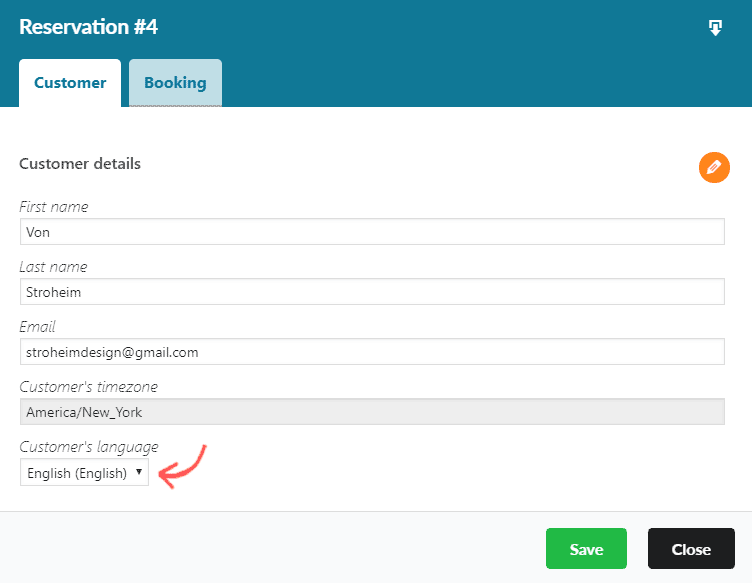
Please note that only the e-mail notifications that are sent to the customer (confirmation, cancellation and reminder) are translatable. The system stores the language selected by the customer so you can see it in the reservation details (Overview tab). You can eventually change that language.